
Image Prediction - Properly load any image dataset as ImageDataset
Preparing the dataset for ImagePredictor is not difficult at all,
however, we’d like to introduce the recommended ways to initialize the
dataset, so you will have smoother experience using
autogluon.vision.ImagePredictor.
There are generally three ways to load a dataset for ImagePredictor:
Load a csv file or construct your own pandas
DataFramewithimageandlabelcolumnsLoad a image folder directly with
ImageDatasetConvert a list of images to dataset directly with
ImageDataset
We will go through these four methods one by one. First of all, let’s import autogluon
%matplotlib inline
import autogluon.core as ag
from autogluon.vision import ImageDataset
import pandas as pd
/var/lib/jenkins/workspace/workspace/autogluon-tutorial-image-classification-v3/venv/lib/python3.7/site-packages/gluoncv/__init__.py:40: UserWarning: Both mxnet==1.7.0 and torch==1.7.1+cu101 are installed. You might encounter increased GPU memory footprint if both framework are used at the same time.
  warnings.warn(f'Both mxnet=={mx.__version__} and torch=={torch.__version__} are installed. '
Load a csv file or construct a DataFrame object
We use a csv file from PetFinder competition as an example. You may use
any tabular data as long as you can create image(absolute or
relative paths to images) and label(category for each image)
columns.
csv_file = ag.utils.download('https://autogluon.s3-us-west-2.amazonaws.com/datasets/petfinder_example.csv')
df = pd.read_csv(csv_file)
df.head()
100%|██████████| 820/820 [00:00<00:00, 56811.80KB/s]
| image | PetID | label | |
|---|---|---|---|
| 0 | petfinder_data/train_images/015da9e87-1.jpg | 015da9e87 | 0 |
| 1 | petfinder_data/train_images/022606901-1.jpg | 022606901 | 0 |
| 2 | petfinder_data/train_images/02f89bdcb-1.jpg | 02f89bdcb | 0 |
| 3 | petfinder_data/train_images/03f217352-1.jpg | 03f217352 | 0 |
| 4 | petfinder_data/train_images/040a9a6f9-1.jpg | 040a9a6f9 | 0 |
If the image paths are not relative to current working directory, you may use the helper function to prepend prefix for each image, using absolute paths can reduce the chance of OSError happening to file access:
df = ImageDataset.from_csv(csv_file, root='/home/ubuntu')
df.head()
| image | PetID | label | |
|---|---|---|---|
| 0 | /home/ubuntu/petfinder_data/train_images/015da... | 015da9e87 | 0 |
| 1 | /home/ubuntu/petfinder_data/train_images/02260... | 022606901 | 0 |
| 2 | /home/ubuntu/petfinder_data/train_images/02f89... | 02f89bdcb | 0 |
| 3 | /home/ubuntu/petfinder_data/train_images/03f21... | 03f217352 | 0 |
| 4 | /home/ubuntu/petfinder_data/train_images/040a9... | 040a9a6f9 | 0 |
Or you can perform the correction by yourself:
import os
df['image'] = df['image'].apply(lambda x: os.path.join('/home/ubuntu', x))
df.head()
| image | PetID | label | |
|---|---|---|---|
| 0 | /home/ubuntu/petfinder_data/train_images/015da... | 015da9e87 | 0 |
| 1 | /home/ubuntu/petfinder_data/train_images/02260... | 022606901 | 0 |
| 2 | /home/ubuntu/petfinder_data/train_images/02f89... | 02f89bdcb | 0 |
| 3 | /home/ubuntu/petfinder_data/train_images/03f21... | 03f217352 | 0 |
| 4 | /home/ubuntu/petfinder_data/train_images/040a9... | 040a9a6f9 | 0 |
Otherwise you may use the DataFrame as-is, ImagePredictor will
apply auto conversion during fit to ensure other metadata is
available for training. You can have multiple columns in the
DataFrame, ImagePredictor only cares about image and
label columns during training.
Load an image directory
It’s pretty common that sometimes you only have a folder of images,
organized by the category names. Recursively loop through images is
tedious. You can use ImageDataset.from_folders or
ImageDataset.from_folder to avoid implementing recursive search.
The difference between from_folders and from_folder is the
targeting folder structure. If you have a folder with splits, e.g.,
train, test, like:
root/train/car/0001.jpg
root/train/car/xxxa.jpg
root/val/bus/123.png
root/test/bus/023.jpg
Then you can load the splits with from_folders:
train_data, _, test_data = ImageDataset.from_folders('https://autogluon.s3.amazonaws.com/datasets/shopee-iet.zip', train='train', test='test')
print('train #', len(train_data), 'test #', len(test_data))
train_data.head()
data/
├── test/
└── train/
train # 800 test # 80
| image | label | |
|---|---|---|
| 0 | /var/lib/jenkins/.gluoncv/datasets/shopee-iet/... | 0 |
| 1 | /var/lib/jenkins/.gluoncv/datasets/shopee-iet/... | 0 |
| 2 | /var/lib/jenkins/.gluoncv/datasets/shopee-iet/... | 0 |
| 3 | /var/lib/jenkins/.gluoncv/datasets/shopee-iet/... | 0 |
| 4 | /var/lib/jenkins/.gluoncv/datasets/shopee-iet/... | 0 |
If you have a folder without train or test root folders, like:
root/car/0001.jpg
root/car/xxxa.jpg
root/bus/123.png
root/bus/023.jpg
Then you can load the splits with from_folder:
# use the train from shopee-iet as new root
root = os.path.join(os.path.dirname(train_data.iloc[0]['image']), '..')
all_data = ImageDataset.from_folder(root)
all_data.head()
| image | label | |
|---|---|---|
| 0 | /var/lib/jenkins/.gluoncv/datasets/shopee-iet/... | 0 |
| 1 | /var/lib/jenkins/.gluoncv/datasets/shopee-iet/... | 0 |
| 2 | /var/lib/jenkins/.gluoncv/datasets/shopee-iet/... | 0 |
| 3 | /var/lib/jenkins/.gluoncv/datasets/shopee-iet/... | 0 |
| 4 | /var/lib/jenkins/.gluoncv/datasets/shopee-iet/... | 0 |
# you can manually split the dataset or use `random_split`
train, val, test = all_data.random_split(val_size=0.1, test_size=0.1)
print('train #:', len(train), 'test #:', len(test))
train #: 655 test #: 81
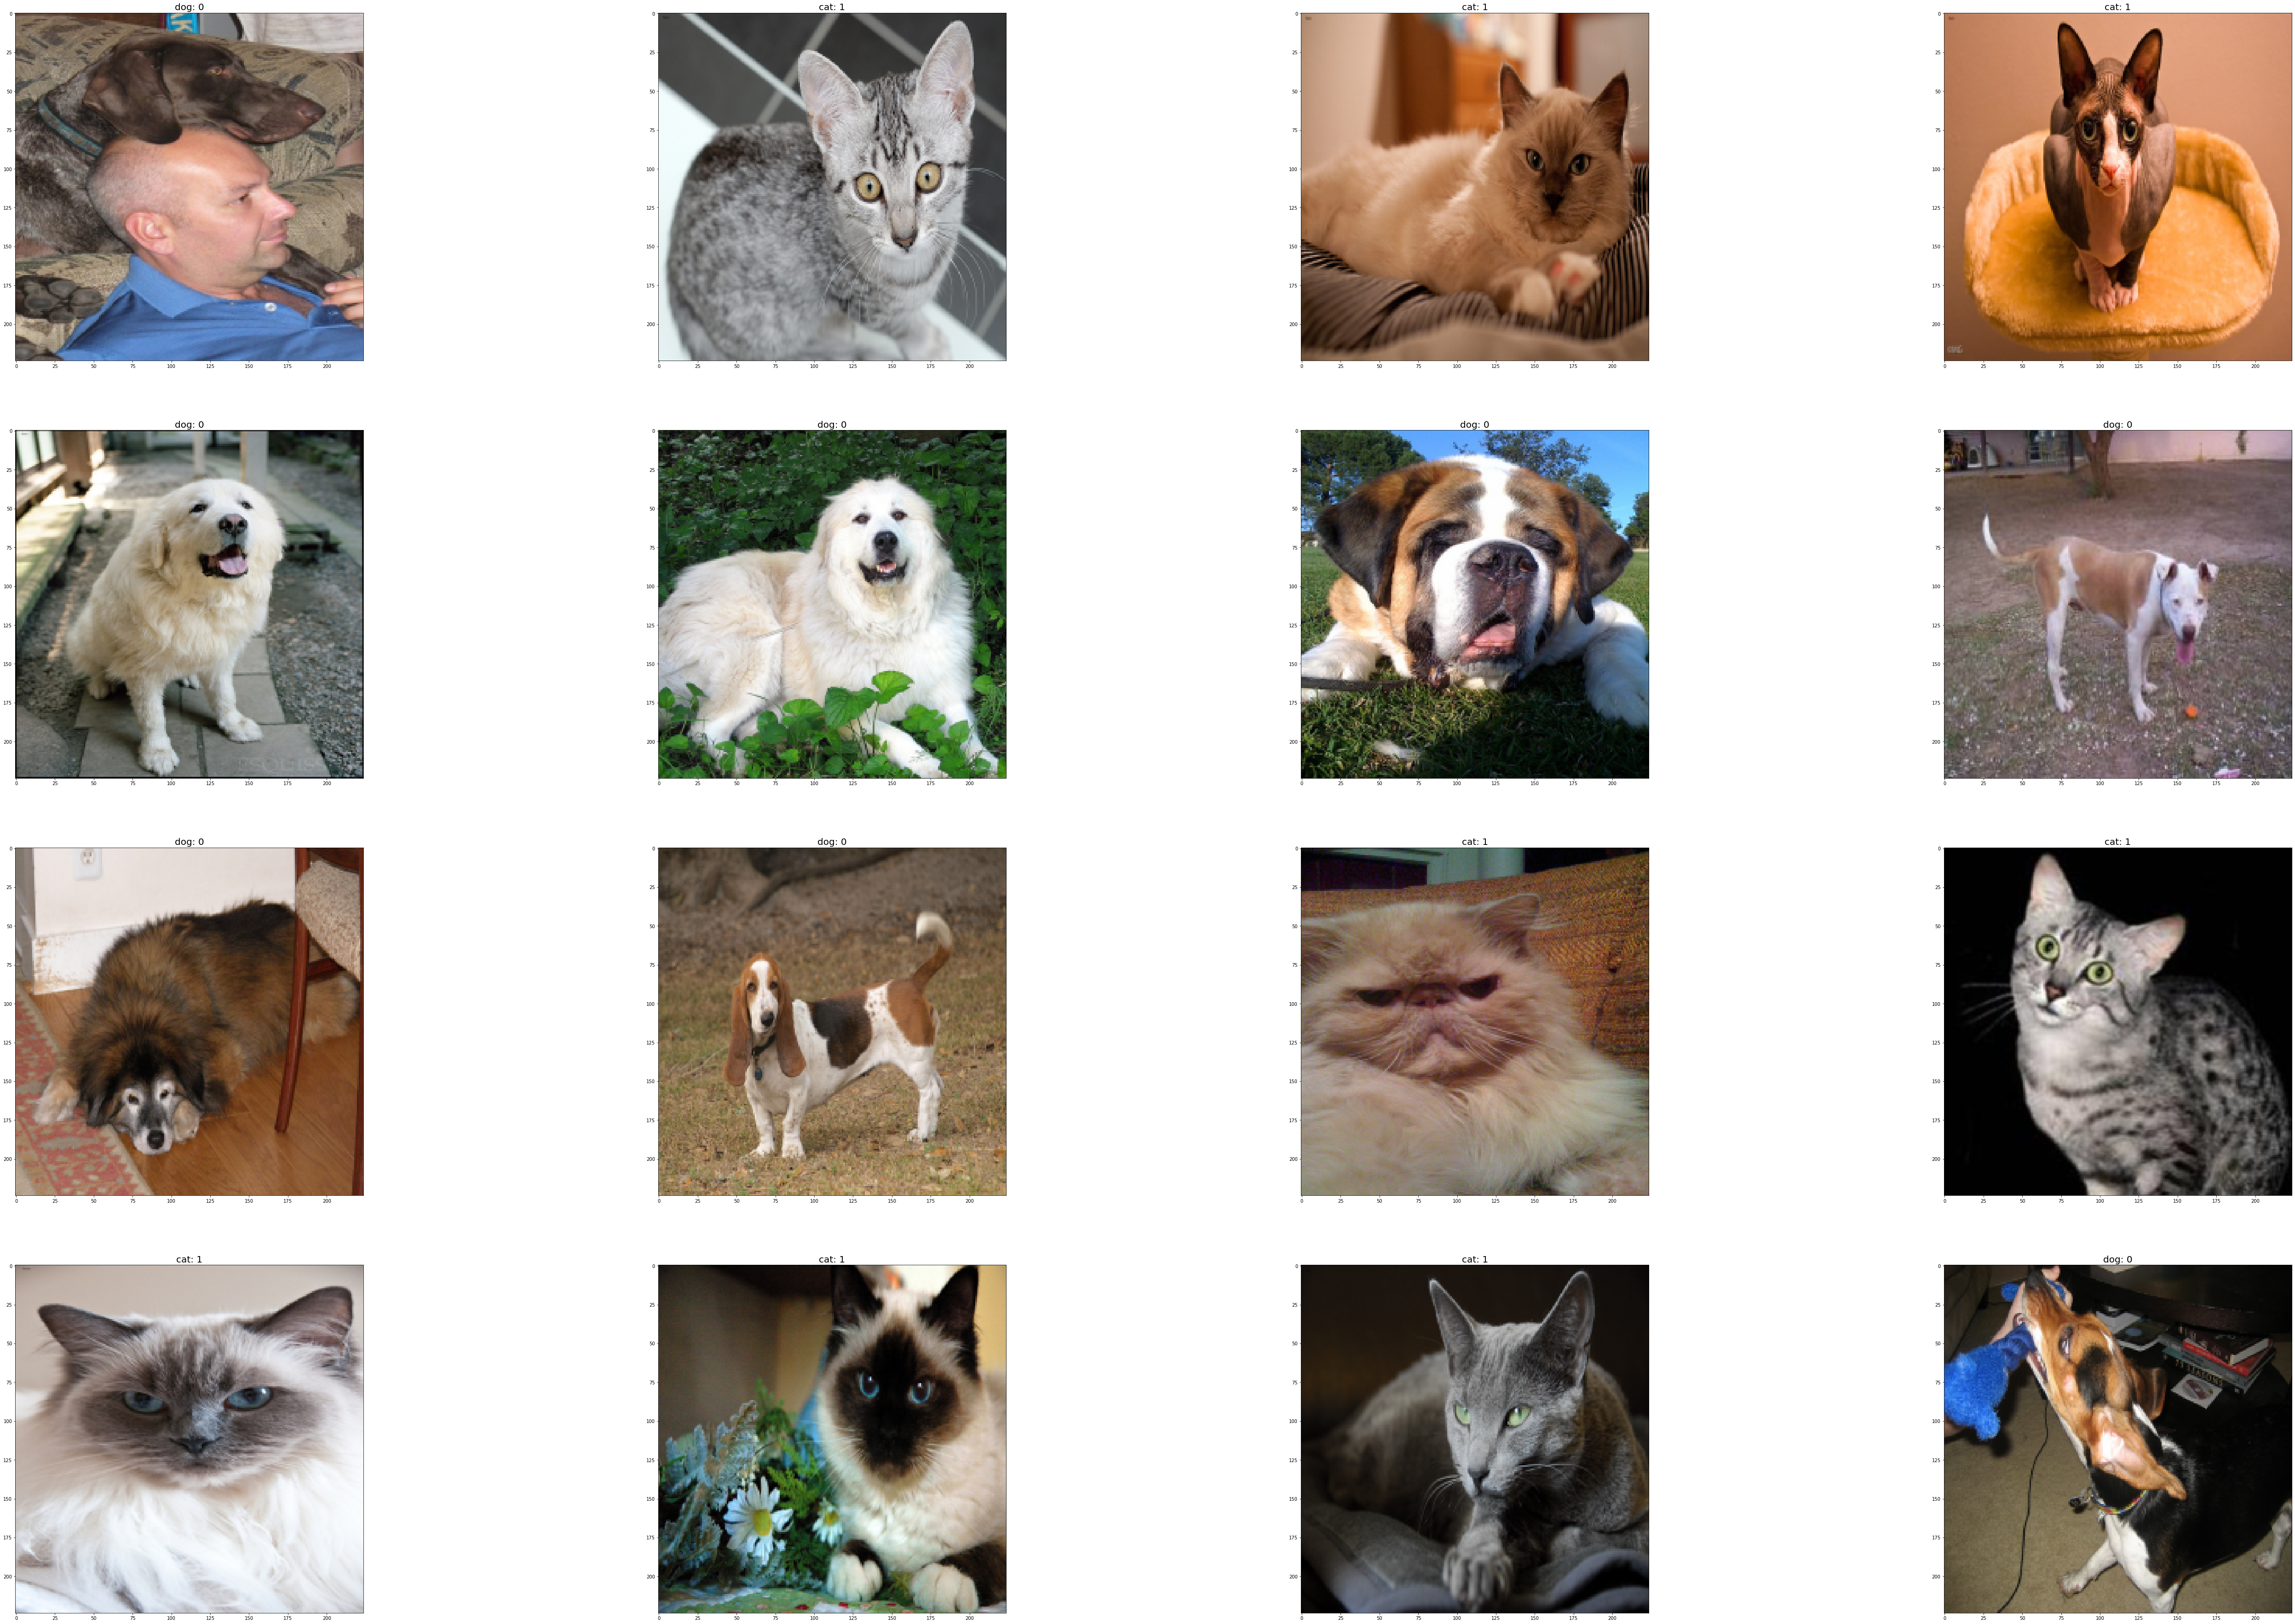
Convert a list of images to dataset
You can create dataset from a list of images with a function, the
function is used to determine the label of each image. We use the
Oxford-IIIT Pet Dataset mini pack as an example, where images are
scattered in images directory but with unique pattern: filenames of
cat starts with capital letter, otherwise dogs. So we can use a function
to distinguish and assign label to each image:
pets = ag.utils.download('https://autogluon.s3-us-west-2.amazonaws.com/datasets/oxford-iiit-pet-mini.zip')
pets = ag.utils.unzip(pets)
image_list = [x for x in os.listdir(os.path.join(pets, 'images')) if x.endswith('jpg')]
def label_fn(x):
    return 'cat' if os.path.basename(x)[0].isupper() else 'dog'
new_data = ImageDataset.from_name_func(image_list, label_fn, root=os.path.join(os.getcwd(), pets, 'images'))
new_data
100%|██████████| 35730/35730 [00:01<00:00, 34461.06KB/s]
| image | label | |
|---|---|---|
| 0 | /var/lib/jenkins/workspace/workspace/autogluon... | 0 |
| 1 | /var/lib/jenkins/workspace/workspace/autogluon... | 0 |
| 2 | /var/lib/jenkins/workspace/workspace/autogluon... | 0 |
| 3 | /var/lib/jenkins/workspace/workspace/autogluon... | 1 |
| 4 | /var/lib/jenkins/workspace/workspace/autogluon... | 0 |
| ... | ... | ... |
| 95 | /var/lib/jenkins/workspace/workspace/autogluon... | 0 |
| 96 | /var/lib/jenkins/workspace/workspace/autogluon... | 1 |
| 97 | /var/lib/jenkins/workspace/workspace/autogluon... | 1 |
| 98 | /var/lib/jenkins/workspace/workspace/autogluon... | 1 |
| 99 | /var/lib/jenkins/workspace/workspace/autogluon... | 1 |
100 rows × 2 columns
Visualize images
You can use show_images to visualize the images, as well as the
corresponding labels:
new_data.show_images()
For raw DataFrame objects, you can convert them to Dataset first to use
show_images.
Congratulations, you can now proceed to Image Prediction - Quick Start to start
training the ImagePredictor.